Installation
System Requirements
- A Windows 10/11 PC to:
- View and optionally modify the firmware source code
- Connect to the Sternum Platform using a web browser (Chrome preferred)
- Connect to the board to flash the different firmwares.
- A USB port on the PC to connect to the board using the USB cable.
The installation and configuration steps described below may trigger some security-related warning/message from Windows. Select Continue, Allow Access or similar to proceed.
Sternum Artifacts
Make sure you have the following artifacts provided by Sternum:
- The EIV installation package: EIV_Setup_[version].exe
- The eval project archive file: lpc5569_freertos_aws_shadow_wifi_serial[version].zip_
- The NXP SDK for the LPC55S69 board: SDK_[version]_LPCXpresso55S69_SDK_FOR_MCUXPRESSO_IDE.zip
- The MCUXpresso IDE 11.8.1 install package.
Board Setup
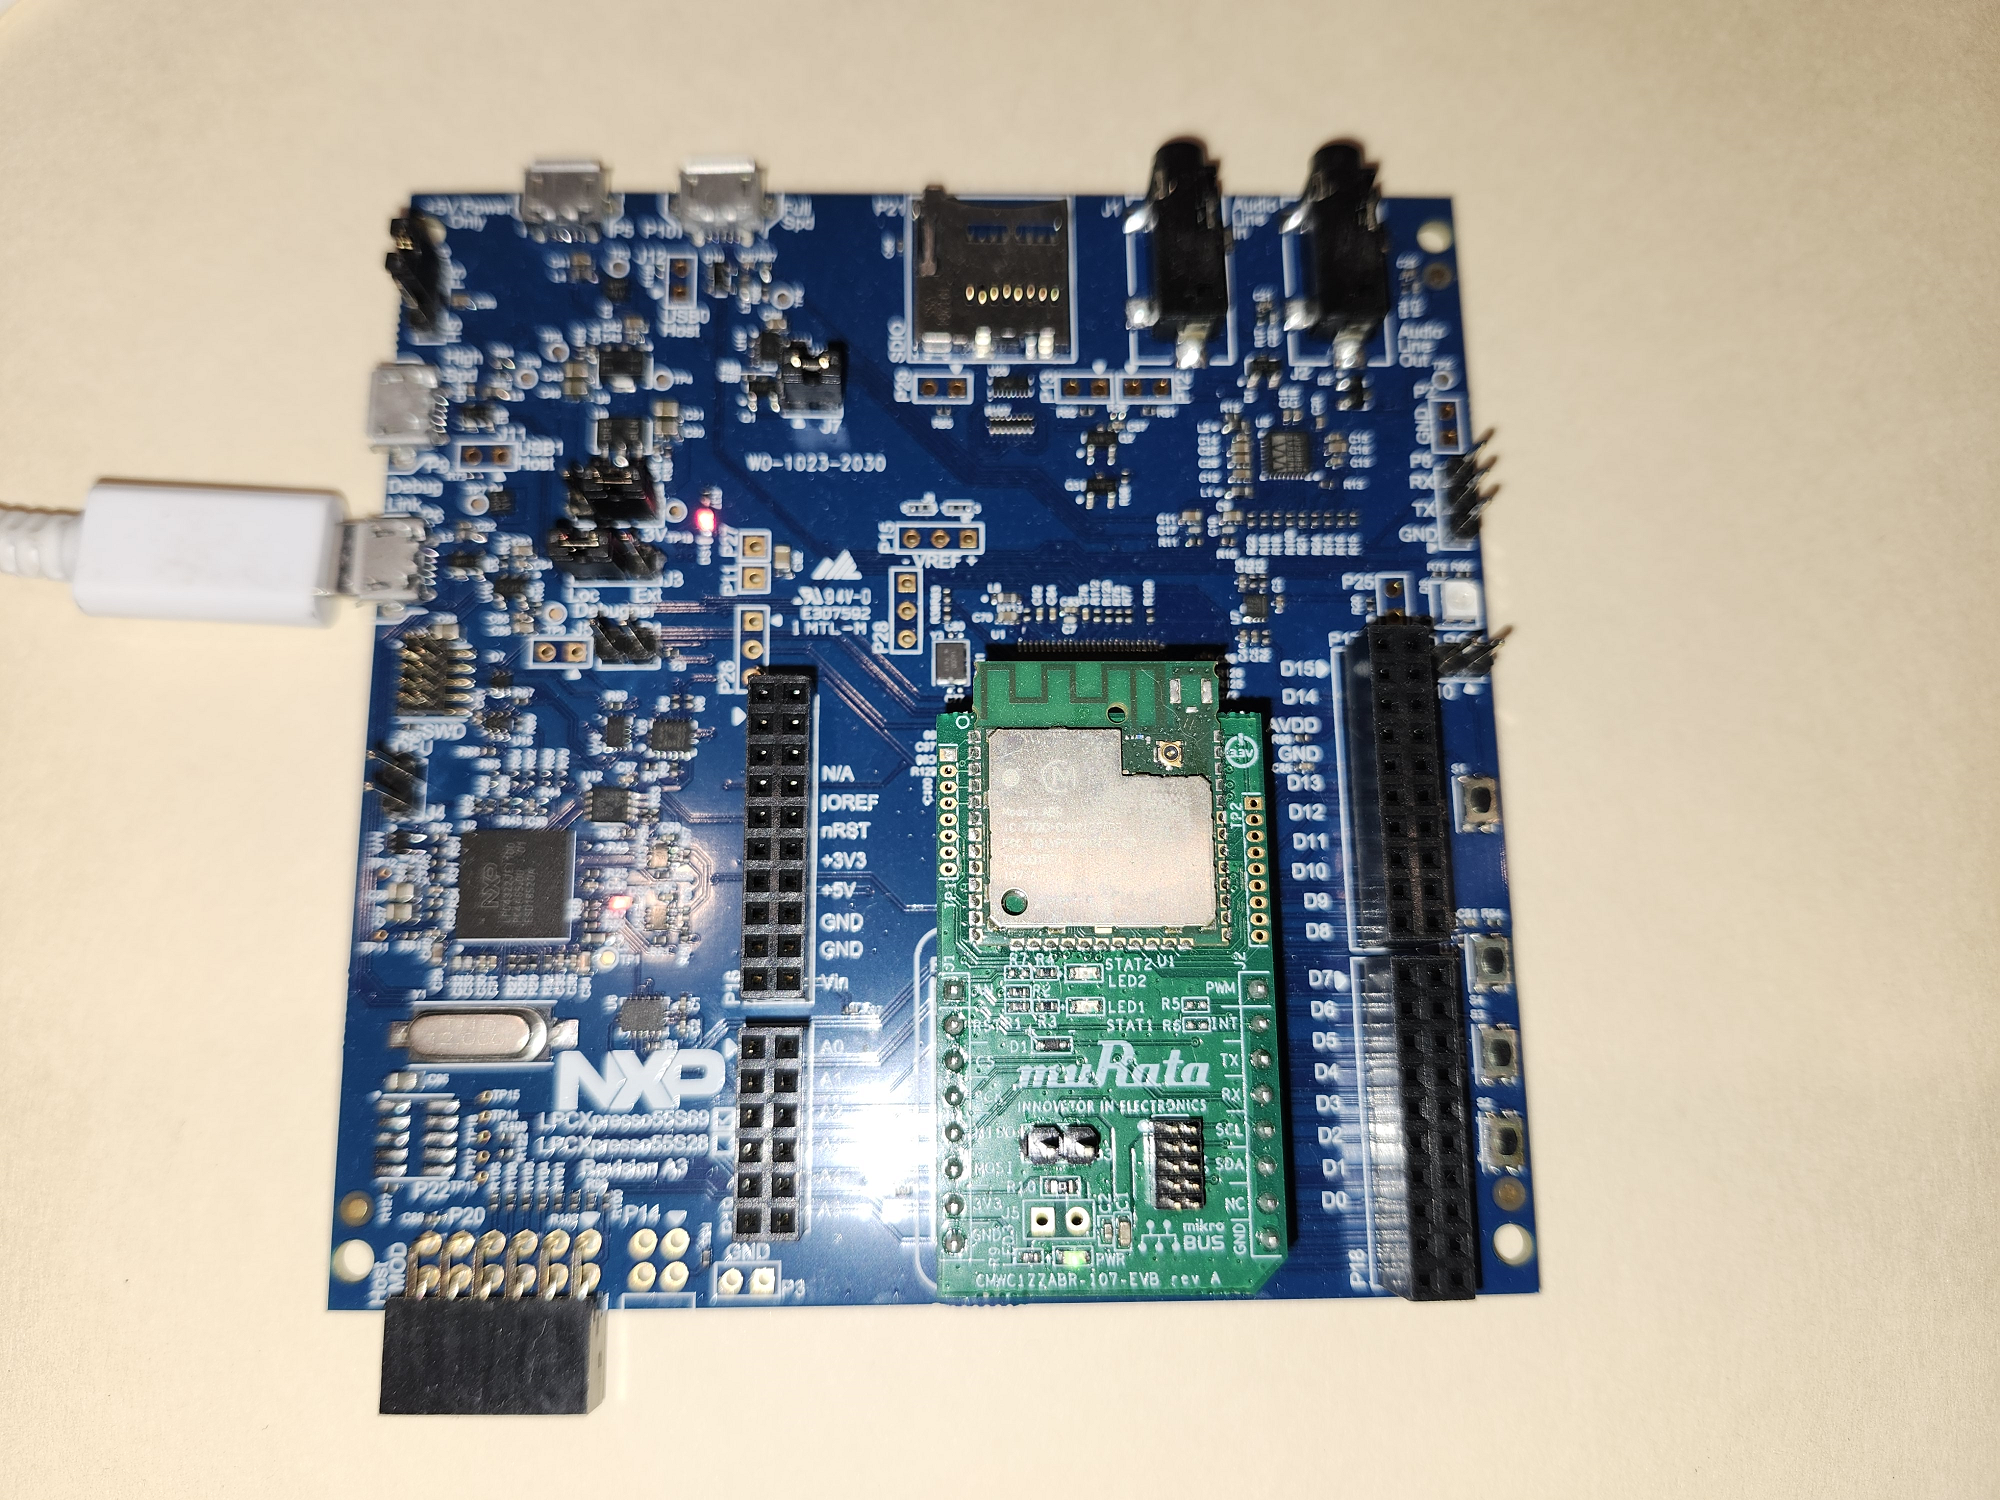
Insert the Murata module into the MikroBUS socket of the development board (see picture below for module orientation).
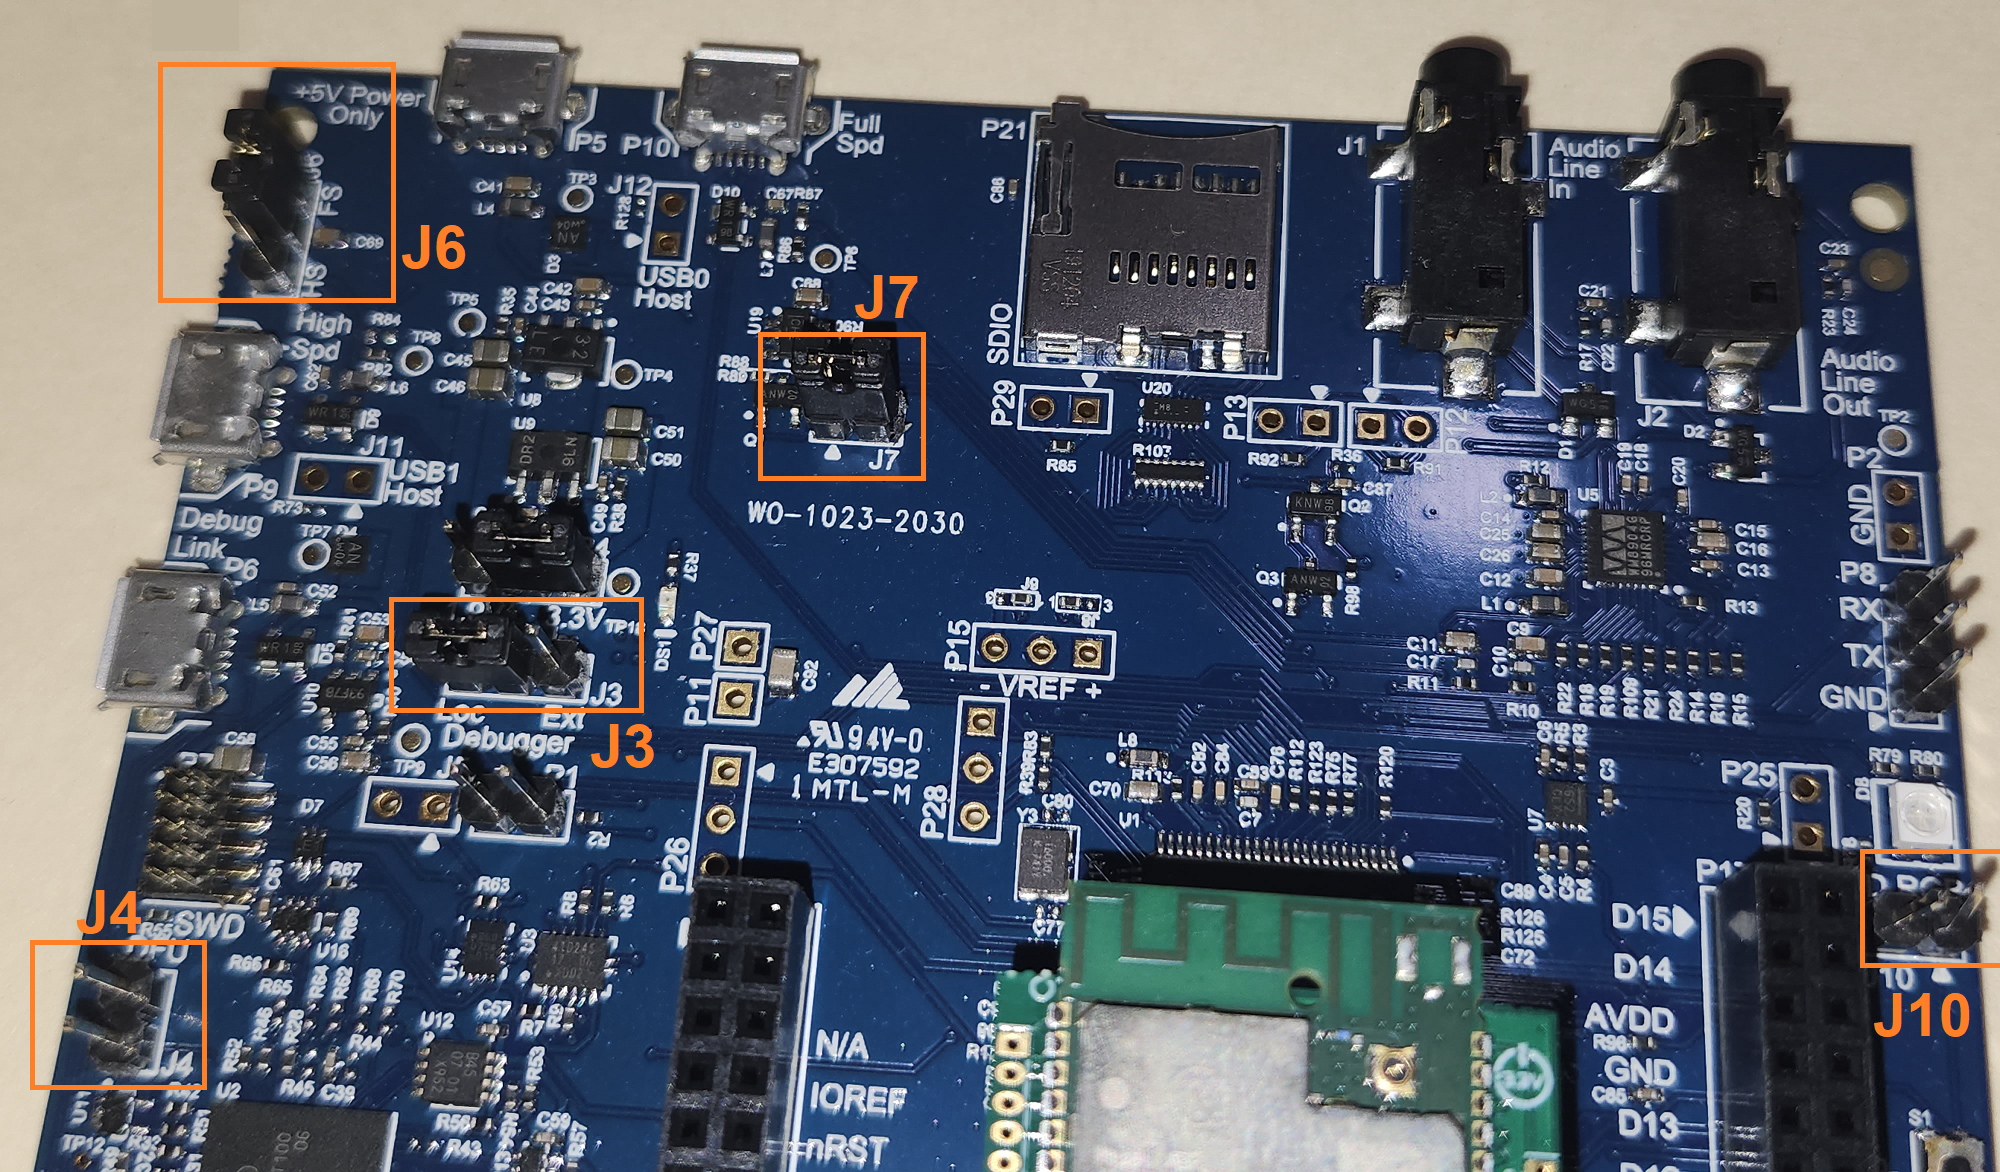
Verify that the board jumpers are in their default configuration (from left to right, top to bottom, per picture below)
- J6 - jumper installed in top position
- J4 - no jumper
- J3 - jumper installed in left position
- J7 - jumper installed
- J10 - no jumper.
Some misconfigured jumpers may prevent the board to boot, upgrade or be seen in the PC COM port list.
Connect the micro-USB cable to P6 connector and to the PC.
Software Installation
EIV
Install EIV on the PC:
Double-click on the EIV_Setup*.exe file
- Windows may display a warning window. Click More info, then "Run anyway".
Go through the installer steps and install EIV in the default destination folder.
MCUXpresso IDE
Install the IDE: Double-click on the MCUXpressoIDE_11.8.1_1197.exe file and proceeed with the default installation.
You can also find this install file at MCUXpresso IDE 11.8.1 (make sure to use this exact version).
Other Required Software
The following software shall also be installed on the PC:
- Python 3.6
- Putty or other Windows terminal software.
IDE and Firmware Setup
SDK Setup
Start the MCUXpresso IDE.
Select a workspace directory. Use a short path too to avoid errors caused by too long paths (exceeding maximum command length). Use for example C:/nxpw.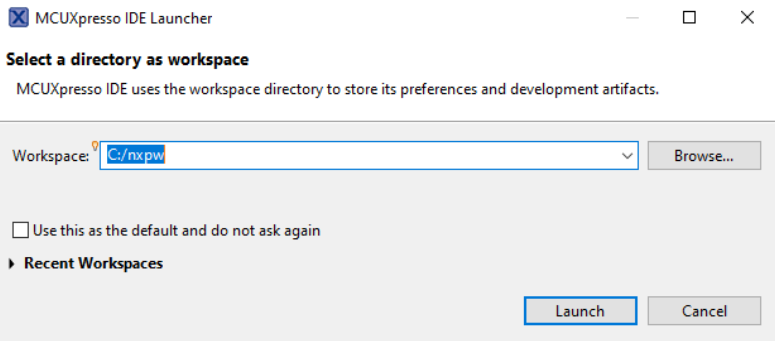
Install the SDK for lpc5569 board provided by Sternum:
Open the Installed SDKs window:
If this window/pane is not displayed, open it via the top menu Window -> Show View -> Other -> MCUXpresso IDE -> Installed SDKs.
Note: You may have to close the Home tab to view the Installed SDKs pane.Drag and drop the SDK zip file provided by Sternum into the Installed SDKs window, and confirm the installation. You should then see:

Project Setup
Unzip the lpc5569_freertos_aws_shadow_wifi_serial-main.zip project to your disk, in the root folder C:/
Rename C:/lpc5569_freertos_aws_shadow_wifi_serial-main to C:/lpc.
Verify that the project's folders and files are indeed under C:/lpc: This is to make sure the project folder and file paths are properly setup and to later avoid build/integration errors caused by too long paths (exceeding maximum command length).
For example, you should have the folder C:/lpc/Exploits.Import the lpc5569_freertos_aws_shadow_wifi_serial demo project in MCUXpresso IDE:
From the top menu: File -> Import, then:Select General -> Existing Projects into Workspace, then Next
Select the C:/lpc directory as the Select root directory
Verify that the Copy projects into workspace checkbox is not selected
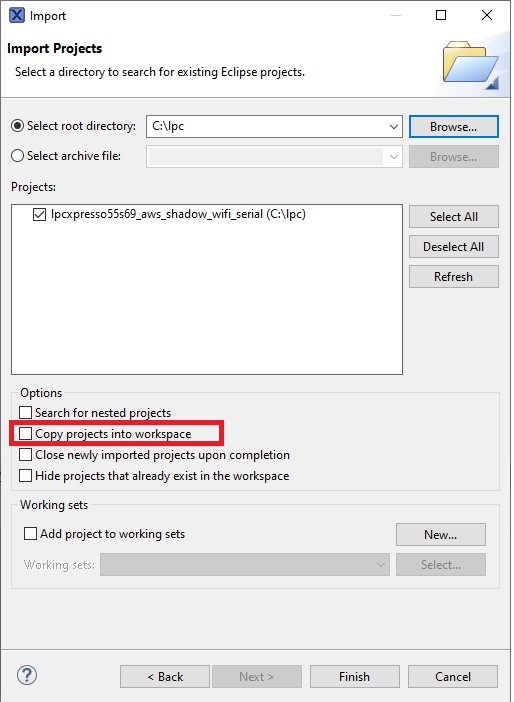
Click Finish.
Assign a unique Serial Number / Device ID to your Eval Board: Open the flle: C:/lpc/sternum-eiv-integration/src/ports/rtos/user_ports.c and update the return value of the sternum_port_get_device_id(void) function to a unique 64-bit unsigned integer.
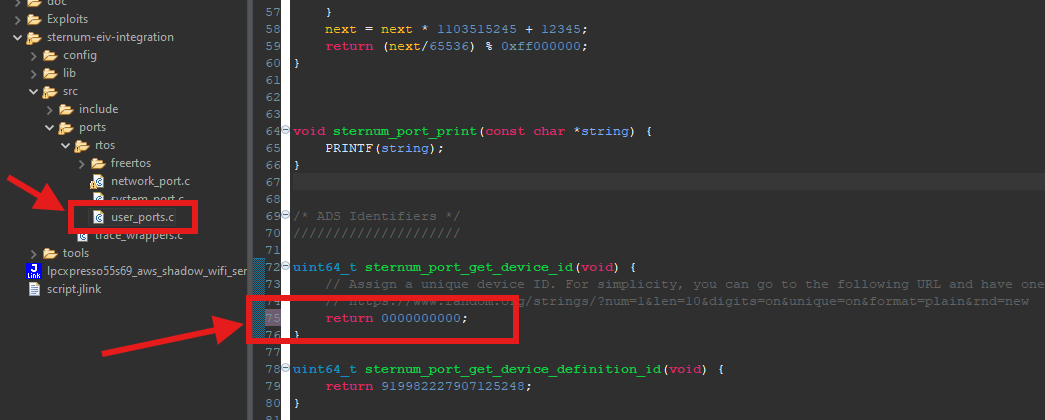 note
noteFor simplicity, you can click HERE and have a unique ID generated for you. Copy and paste the unique ID as the return value to the sternum_port_get_device_id(void) function and Save.
Build the project to verify it was imported correctly:
From the top menu: Project -> Build All
In the CDT Build Console, you should see the build messages and messages generated by EIV Runner - which integrates EIV into the firmware.
The final message should be something like: 17:37:30 Build Finished. 0 errors, 3 warnings. (took 48s.949ms). It is ok to have some warnings.