SDK Setup
To start adding traces in your device, you first need to download the following components:
- SDK Configurator - The graphical editor to model and configure traces
- An SDK package appropriate to your device and programming language (generally the C/C++ SDK to instrument IOT/embedded devices)
- Optionally, if a Relay application is needed, the SDK package(s) appropriate for the Relay device(s).
For example, Bluetooth-based consumer devices (such as glucose monitors) would require both an Android and iOS Relay application that run on a smartphone. Both Android and iOS SDKs are needed in that case to develop the Relay application.
Inquire with Sternum to obtain the download links for the SDK(s) you need.
The steps below document the installation and configuration of these components.
SDK Configurator
SDK Configurator is a desktop application that can be used by both product managers and firmware developers to define or review monitoring traces for the firmware.
SDK Configurator connects to and synchronizes device profile data with the Sternum Platform, allowing multiple team members to work on the same device configuration and trace definitions.
SDK Configurator should be installed on the developers' computers to generate what is called the trace definition files. These files contain the constants associated with the trace definitions in the different programming languages. These constants are used with the SDK API when implementing traces in the firmware code.
System Requirements
- Windows 10 or 11
- Linux Ubuntu 20.04
- Mac OS.
Installation
First, download the SDK Configurator software package from the Sternum Platform's Settings page:
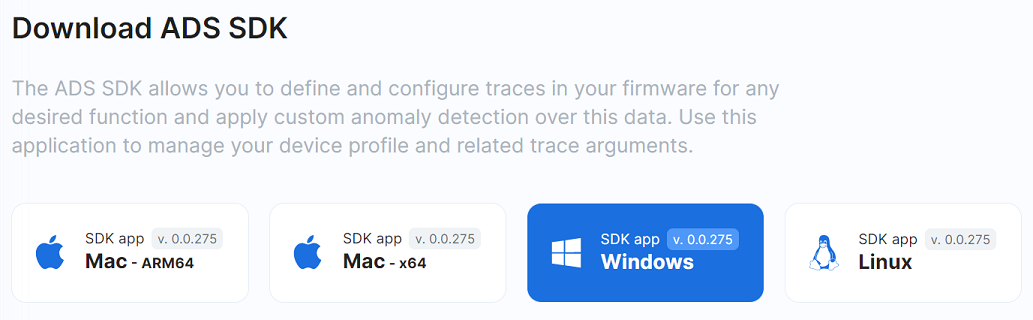
Windows Platform
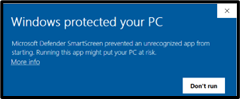
Run the executable file.
- If Windows displays the following alert window, click More Info, then Run Anyway.
Linux Platform
- Run the executable file.
Mac Platform
- Run the executable file.
- Drag the SDK Configurator App to the File Folder.
Configuration
Connection to the Sternum Platform
SDK Configurator shall be set up after installation. An Account in the Sternum Platform is required.
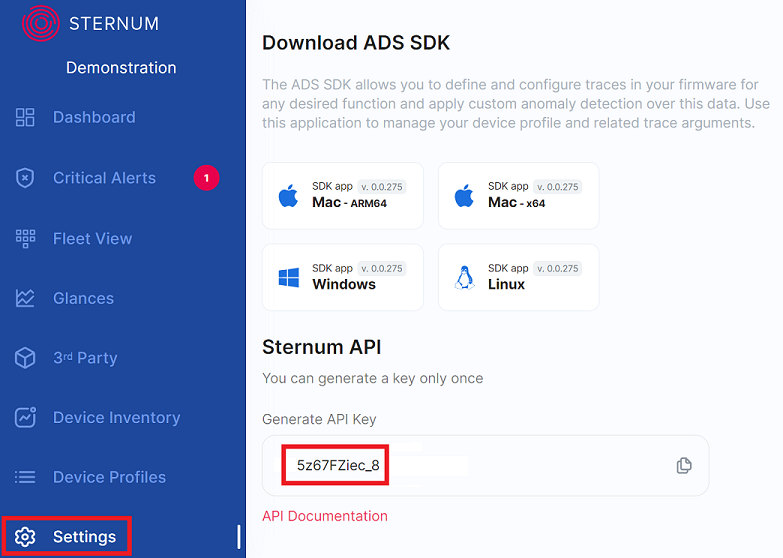
Retrieve the Sternum API Key
- Connect and login to the Sternum Platform's Settings page - https://app.sternum.cloud/settings
- Copy the API Key
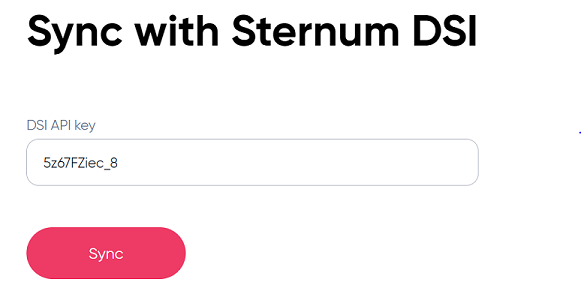
Open SDK Configurator
- Enter the API Key and click Sync
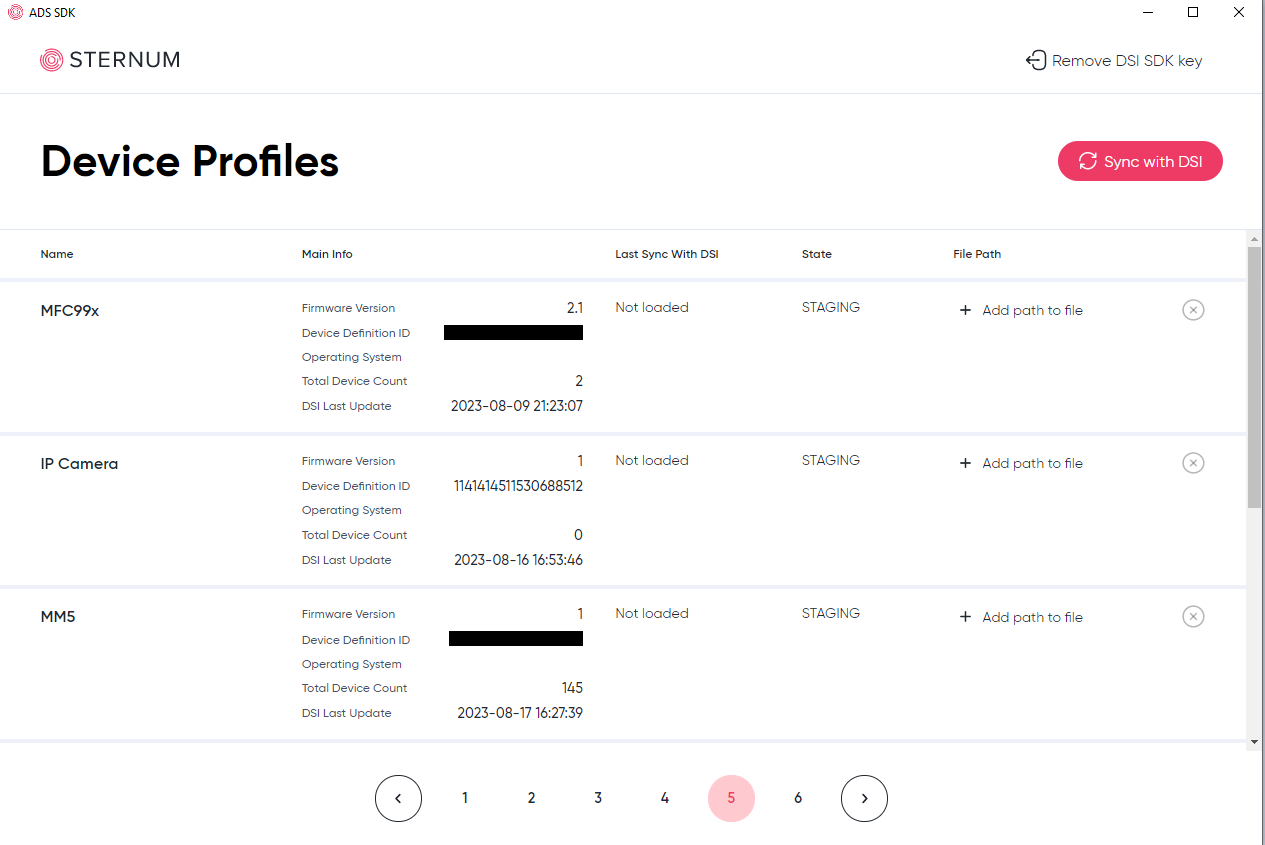
Following the initial sync with the Sternum Platform, the list of Device Profiles will be displayed in SDK Configurator:
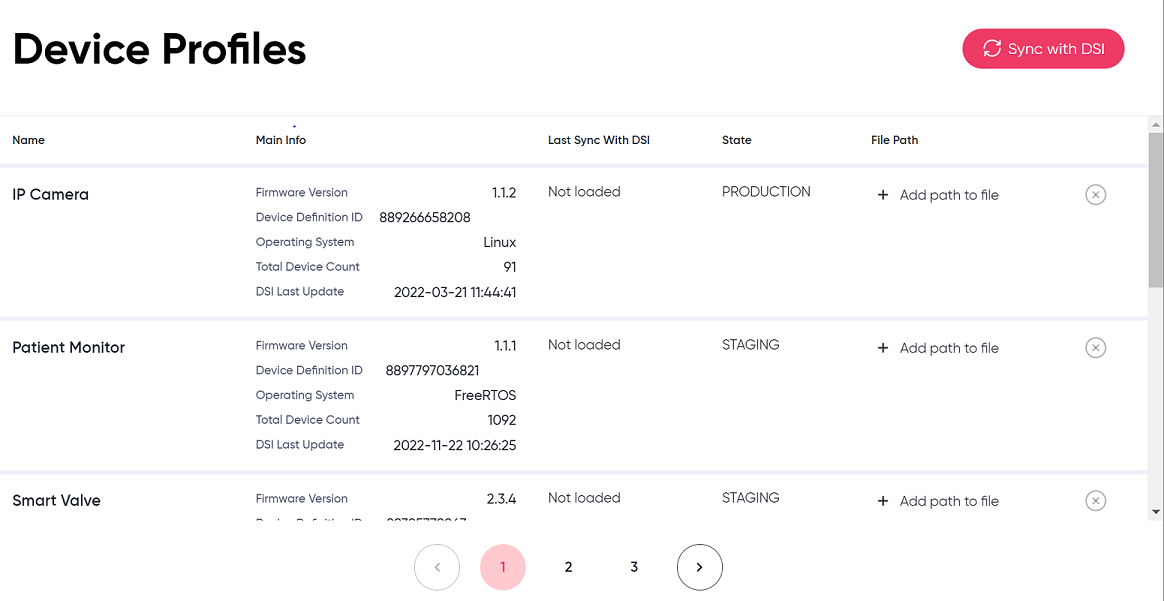
The Sync button triggers the data synchronization with the Sternum Platform, for example to retrieve new or modified data from the Sternum Platform or to push new or modified local data to the Sternum Platform.
For example, we can see the IP Camera device profile:
Project Configuration
On the Sternum Platform, a Device Profile should exist for each firmware version of a product. For example, IP Camera version 1 as shown on the screenshot above.
In SDK Configurator, you should first select the correct Device Profile associated with your firmware project and configure the directory where SDK Configurator will generate the trace definition files in the project.
Where to generate these files in your project depends on the target programming language and project setup. For example:
- For C/C++ projects, there is a single trace definition file trace_protocol_user_definition.h, which is generally located in a dedicated include directory.
- For Android and Java projects, there are 2 trace definition files that are generally located in a sternum Java package somewhere in the package hierarchy.
To configure the target directory for the trace definition files:
Click on
+ Add Path to fileon the IP Camera device profile on SDK Configurator:Select the target directory appropriate for your SDK type (refer to the specific SDK guide for guidance).
Select the appropriate trace definition language (e.g.
javaorheader (*.h)) as the file type as shown below. For example: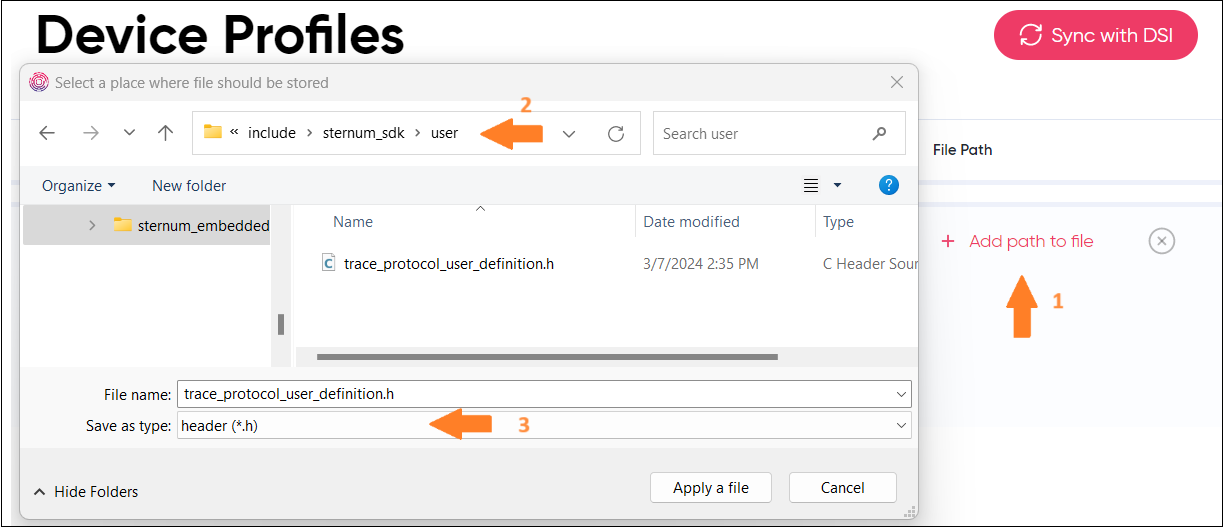
To check the configuration, synchronize the profile with the Sternum Platform - click on the Sync with DSI button (top right), then check that the trace definition file(s) have been generated or updated in the configured directory.
Generally, you may have to update your include path for C/C++ projects and Java paths for Java projects to use these trace definition files. Refer to the Setup section of the specific SDK documentation for specifics.
SDK Setup
The SDK packages are delivered as a compressed archive and contain the necessary files to use the associated SDK, as well as examples.
Refer to the documentation of the specific SDK for details.